Description
Nintendo GameCube Xeno GC Direct Reading Modchip
Nintendo GameCube Xeno GC Direct Reading Modchip: Learn about modding your GameCube with Xeno GC modchip for direct disc reading. Enjoy enhanced gaming experience with this hardware modification.
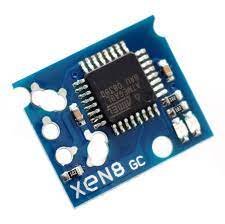
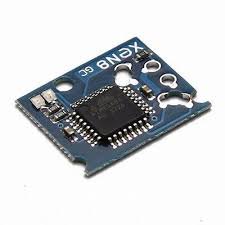
This listing is for a XenoGC ModChip for the Nintendo Gamecube. When installed, this ModChip will allow you to unlock your console, allowing you to play game backups from a DVD-R or DVD-R Mini disc. This chip is soldered directly onto the GameCube disc drive unit, and works with any version/region of GameCube.
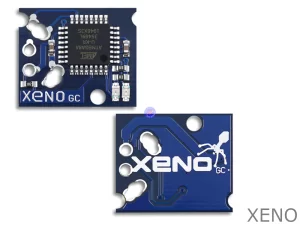
This ModChip requires you to solder 6 points from the chip directly onto the bottom of your GameCube disc drive, the Modchip sits nicely on the circuit board and does not require any wires, you simply solder the points directly onto the board. Please check the picture in the listing for a demonstration.
Nintendo GameCube Xeno GC Direct Reading Modchip Features:
– Direct boot of DVD-R media
– Compatible with all versions and all regions
– Region free loading
– Supports Multi Disc games
– No wires required, solders directly onto the Disc Drive unit
– PAL/NTSC region force feature
– Status LED for troubleshooting
– Force NTSC mode by pushing X during disc load, or PAL mode by pushing Y during disc load
Replacing a modchip in a Nintendo GameCube, such as the Xeno GC Direct Reading Modchip, is a relatively advanced procedure that requires soldering skills and a good understanding of electronics. Modifying your console in this way could potentially damage the system if not done correctly. If you’re not experienced with soldering and console modifications, we strongly recommend seeking help from a Nintendo Repair professional technician. That said, here are the general steps for replacing a modchip:
- Gather the Necessary Tools and Parts:
- Xeno GC Direct Reading Modchip or the modchip you intend to install.
- Soldering iron and solder.
- Screwdrivers to open the GameCube.
- Wire strippers and cutters.
- Multimeter for testing connections.
- Anti-static wrist strap to protect sensitive components.
- Prepare Your Workspace:
- Find a clean, well-lit, and static-free workspace.
- Use an anti-static wrist strap to protect sensitive components.
- Power Off and Disassemble the GameCube:
- Ensure the GameCube is completely powered off and disconnected from any power source.
- Use a screwdriver to open the GameCube and access its internals.
- Identify the Modchip Installation Points:
- Locate the points on the GameCube’s motherboard where the modchip should be soldered. This information should be available in the modchip’s installation instructions or online guides specific to your modchip.
- Solder the Modchip:
- Carefully solder the wires from the modchip to the designated points on the GameCube’s motherboard.
- Ensure that the solder connections are clean and secure. Use the multimeter to test the continuity of your soldered connections.
- Test the Modchip:
- Reassemble the GameCube.
- Power on the GameCube and test the functionality of the modchip. This may involve running backup copies of games or homebrew software.
- Finalize the Installation:
- Once you’ve verified that the modchip is functioning correctly, reassemble the GameCube, ensuring all screws are properly tightened.
- Optional: Install a Switch or Disable the Modchip:
- Some modchips come with a switch that allows you to enable or disable the modchip. If you want to use this feature, install the switch in a convenient location.
- Alternatively, you can add a switch or jumper to enable/disable the modchip manually if it doesn’t come with one.

