Description
Nintendo Switch Lite LCD Screen Display Replacement : Compatible – Only for Nintendo Switch Lite
Application – Used for fix a faulty screen, and cure-replace cracked, broken, dead pixels, touch is not working, touch response issues, display problems, wrong color issues, non-functioned screen.etc.
Strict Quality Control – All products have passed strictly QC double tested and 100% in good condition.Professional installation is highly recommended.
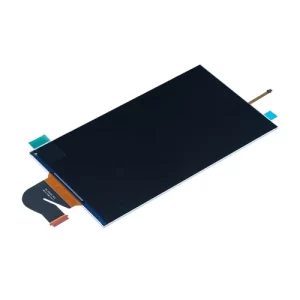
The general information on replacing the display for a Nintendo Switch Lite. Please note that this is a complex procedure, and if you’re not experienced with electronics or comfortable with disassembling and reassembling devices, it’s recommended to seek professional assistance or send the device to Nintendo for repair. Attempting to replace the display yourself may spoil the console.
Here are the general steps for replacing the display on a Nintendo Switch Lite:
- Gather the Necessary Tools and Parts:
- Replacement LCD screen for the Nintendo Switch Lite.
- Screwdrivers (Phillips and tri-wing) to open the device.
- Plastic prying tools to open the case without damaging it.
- Tweezers for handling small components.
- A heat gun or hairdryer for softening adhesive.
- Prepare Your Workspace:
- Find a clean, well-lit, and static-free workspace.
- Use an anti-static wrist strap to protect sensitive components.
- Power Off the Device:
- Ensure the Nintendo Switch Lite is completely powered off and disconnected from any power source.
- Disassembly:
- Carefully remove the screws from the back of the device using the appropriate screwdriver.
- Use plastic prying tools to gently open the device’s case, being careful not to damage the plastic clips or ribbon cables inside.
- Once the case is open, you’ll have access to the internal components, including the display.
- Disconnect the Old Display:
- Locate the ribbon cable connected to the old display and carefully disconnect it from the motherboard.
- Remove any adhesive or tape securing the display in place.
- Replace the Display:
- Carefully remove the old display and replace it with the new one.
- Reconnect the ribbon cable to the motherboard.
- Secure the new display in place with adhesive or tape if necessary.
- Reassembly:
- Carefully reassemble the device in the reverse order of disassembly.
- Ensure all screws are properly tightened but not over-tightened.
- Snap the case back together, ensuring all plastic clips are securely engaged.
- Testing:
- Power on the Nintendo Switch Lite to test the new display for functionality.
- Check for any issues, such as dead pixels or misaligned components.
- Final Inspection:
- Once you’re satisfied with the repair and the device is working properly, you can close it up.
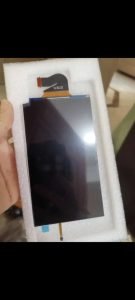
Remember, this is a general outline, and the specific steps may vary depending on the model and design of your Nintendo Switch Lite. Additionally, performing this repair may spoil the device, so consider that before proceeding. If you’re not comfortable with these steps or don’t have experience with electronics repair, it’s best to consult our Nintendo’s official repair services.


